Tuesday, February 1, 2011

Kid Friendly Meatballs In Tomato Veggy Sauce

I have one son who is adamantly against trying anything with any type of vegetable in it (even tomatoes, they can only be in the form of tomato sauce, not even ketchup)  When asked what kind of vegetables he eats, he proudly answers 'pickles'.  Cant get him to try anything new, because he's scared of what will be in it.  We've offered him everything imaginable to get him to taste a new food, but he is more stubborn then anyone I've ever met (and I've been acquainted with quite a few stubborn people in my life time)
I often try to disguise vegetables, by putting it into foods he does eat.  Last night for supper, I served meatballs and spaghetti.  To bring in more nutrition, I placed carrots and celery in the food processor before adding it to the sauce.  Verdict: Successful!  Plates were all empty at the end of the meal, and my husband commented that there was something different about the sauce that actually made it taste even better then normally.

Kid Friendly Meatballs In Tomato Veggy Sauce

Sauce
  • 1 large carrot - chopped in large chunks
  • 2 stalks of celery - chopped in large chunks
  • 2 Tablespoons oil
  • 1 large onion - diced very small
  • 5 cloves garlic - crushed or minced
  • 1/2 teaspoon salt
  • 3/4 teaspoon black pepper
  • 3/4 teaspoon oregano
  • 1/2 teaspoon paprika
  • 1/4 teaspoon chili
  • 3/4 teaspoon sugar
  • 2 small cans tomato sauce
Place carrots and celery in food processor, and pulse till almost a thick paste.  Heat oil in medium sized pot.  Saute onions till slightly brown. Add garlic and spices, mix over low flame.  Add tomato sauce, 1 can of water, and carrot mixture from food processor.  Bring to boil, then lower to simmer as you prepare the meatballs.
Meatballs
  • 1 lb ground meat
  • 1 egg beaten
  • 1/4 cup whole wheat bread crumbs
  • 2 Tablespoons ketchup
  • 1/4 teaspoon salt
  • 1/4 teaspoon black pepper
  • 1/4 teaspoon oregano
  • 1/4 cup water 
Place all ingredients in bowl and mix till uniform texture.  With damp hands, form walnut size balls and add to sauce.  Simmer for one hour.  Serve over whole wheat spaghetti for a healthier meal.


Vegetables in food processor.

Vegetables after processing.


Bon appétit,
Chanie

Monday, January 31, 2011

Effortless Silver Polishing

I have tons of patience when it comes to decorating or baking... I can get lost in time.  But when it comes to other housework, I'm the biggest procrastinator.   One of my worst chores, is silver polishing.  I have real knack for pushing that off.  In fact this past Shabbat, I was looking at my candlesticks and marveled at the many colors of tarnish that developed on it.  Although it was rather unique looking, I still decided that as soon as my week began, I would tackle it.
Well Monday morning came, and I really could not bring myself  to take out the silver polish. I hate the way everything that gets touched with the silver polish gets black, I hate the way the polish gets stuck in the small crevices leading to hours or Q-tip work... There had to be a better way out there.
I searched the internet and learnt a bit of chemistry.  You can make a  electrochemistry dip out of regular household products.  By using a solution of hot water, baking soda and salt, along with a piece of aluminum foil, you can make an easy dip that takes off the tarnish from your silver without any scrubbing at all.

What you need:
  • tarnished silver
  • hot water
  • baking soda
  • salt
  • aluminum foil
  • sink or large glass bowl
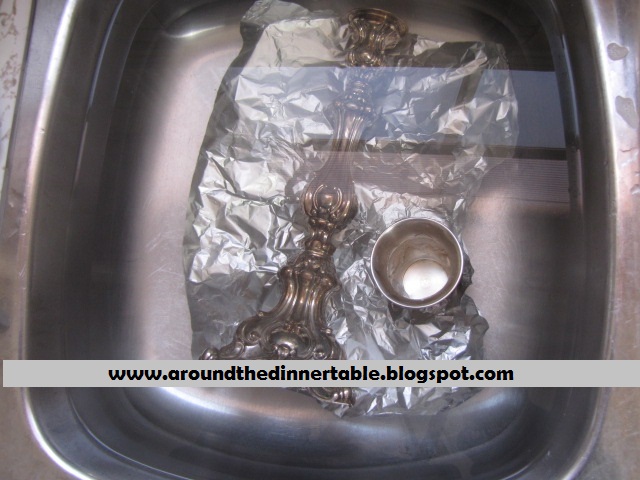
Line bottom of sink or bowl with aluminum foil.  Add hot water and dissolve baking soda and salt.  I found that for a medium size bowl, I needed approximately 2 teaspoons each of baking soda and salt.  You'll need more for large bowls or sink. Leave tarnished items in water for 1-5 minutes, until you see that the tarnish is no longer there.  Wipe dry with soft towel.


Before and after

Silver soaking in solution.


Have a good day,
Chanie

Sunday, January 30, 2011

Moist And Delicious Amaretto Cake

Thirteen years ago, my sister and her family were invited by a friend to join her family for Purim seuda.  My sister turned her down, to join the meal my parents were hosting for all of us.  Her friend graciously accepted being turned down, and sent something for our family to enjoy that Purim.  My sister came in with the cake  that her friend sent and placed it on the table while my mother got ready to serve the meal. My mother left the room for under 5 minutes and when she returned to try the cake, the entire bundt cake was already devoured.
The cake was perfect, it was taste and moist without being heavy.
Fast forward six years, the cake has not been mentioned in all that time.  I was sitting in my kitchen going through some cookbooks, trying to find the perfect cake.  My memory took me back to my parents dinning room a few years earlier.  That Purim, we were all still living in Brooklyn.  I think that might have been one of the last Yom Tov meals we all actually ate together as a family before we all started moving away.  (To get us together at one time isn't as easy these days, there are six of us in three countries, six different cities.)  So I wondered, was the cake really as good as memory, or could it have been made great by the memory.  I had to track down that recipe and try it. 
When I called my sister to ask her to try tracking down the recipe, she too started reminiscing the taste.  Now we knew we had to get it.  She promised to call the friend and fin out if she still had the recipe.  Of course she did, and the cake didn't disappoint my memory.  The cake has now become the most requested in my house and always gets tons of compliments when I send it over to friends.  Not only in this cake fabulous tasting but its a super easy one bowl cake. The cake is delicious as is or dusted with icing sugar, but I found that the glaze I experimented with compliments it beautifully.

Amaretto Cake
  • 2 cups flour
  • 2 cups sugar
  • 1 package instant vanilla pudding (I find its best with Jello brand pudding mix)
  • 2 tsp. baking powder
  • 4 large eggs
  • 3/4 cups orange juice
  • 2/3 cup oil
  • 1/4 cup vodka
  • 1/4 cup amaretto

Preheat oven to 350.  Grease and flour a bundt pan. Place all ingredients in bowl of mixer and mix at medium speed till smooth.  Pour batter into pan and bake in oven for 1 hour or until toothpick test comes out clean.
Allow to cool for 10 minutes, then turn over on cooling rack and continue to cool in pan.  Don't remove from pan until completely cool or you will break the cake.

Almond Glaze
  • 1/2 cup icing sugar
  • 1/2 teaspoon almond extract
  • 3-5 teaspoons water

Place sugar and extract in small bowl.  Add water one teaspoon at a time and mix till reaches a smooth, thick but pourable consistency.  Drizzle glaze over cooled cake.


Till next time,
Chanie

Thursday, January 27, 2011

Hearty Lentil Soup and Garlic Bread

We can pretend its not here, but its inevitable.  The wind that hits us as we trudge home!  My husband is definitely does the trudging.  He walks 2km to work and 2 back, whatever the weather.  Be it a mid-summer hear wave or when it's -40 in the winter (by the way, -40 is the point where Celsius and Fahrenheit meet) And when my husband gets home these days, a hearty hot bowl of soup is exactly what this weather calls for.   This lentil soup is really fulling, especially with the garlic bread that I like to serve on the side.

Hearty Lentil Soup
  • 1 Tbs olive oil
  • 1 large onion - large dice
  • 6 cloves garlic - chopped
  • 2 medium zucchini - diced'
  • 2 tsp. oregano
  • 6 cups clear chicken soup (or Osem soup mix plus water = 6 cups)
  • 1 cup dry red lentils
Heat olive oil in large pot.  Saute onion till just begins to brown.  Add garlic and zucchini and continue to cook for 5 minutes, stirring occasionally.  Add oregano and chicken soup.  Bring to boil, then lower to simmer.  Cook covered for around 20 minutes, till zucchini is soft. Blend with immersion blender (or in batches in regular blender - return to pot)  Add lentils and cook till soft, 10 - 15 minutes.

Garlic Bread
  • 2-12" frozen baguettes (I buy by the case in Costco's - can use 1 already baked French or Italian bread)
  • 1/4 cup olive oil
  • 3 tsp. garlic powder
  • 1 1/2 tsp. salt
  • 2 tsp dry parsley (or 2 Tbs. fresh parsley - finely chopped)

Bake frozen baguettes according to package directions.  Slice every 3/4 inch leaving some at bottom connected.  Mix olive oil, garlic, salt and parsley in small bowl.  With basting brush, spread garlic mixture between slices.  Spread remaining mixture over whole loaf.  Wrap in aluminum foil.  Bake at 350 for 10-15 minutes.


Enjoy,

Chanie

Wednesday, January 26, 2011

Kids In The Kitchen #2 - Snow Ice Cream

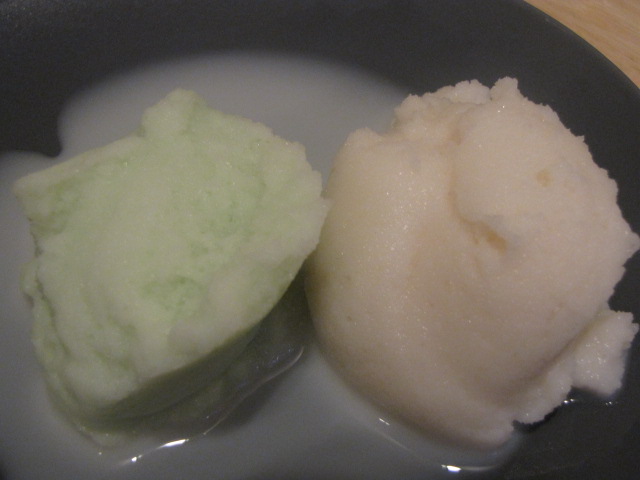
-10ºC doesn't  seem so cold anymore, after the weather we had over the weekend.  I'm practically searching for my flip-flops and beachwear. With the warmer weather, comes the snow (anyone who lives in a cold climate, knows that if its snowing, then it's not bitter outside.  In fact, if its really sunny outside, when you cant look at anything outside without squinting because of the way the sun reflects off the snow, you know that its a frigid day)  We haven't had a lot of snow, nowhere near you poor New Yorkers, who are once again being hit with a storm (what number storm are you up to anyways?), but we has been a steady flurry all day.  Early in the morning I put a wide rimmed bowl, out on the back porch to collect the fresh snow as it falls.  Today we are making Snow Ice Cream!  This is the perfect snow day activity for the kids, and has delicious results.   Just make sure to catch fresh snow, as it's not an appetising thought to eat that greying snow that fell 2 days ago.  Today we made 2 flavors, vanilla and mint (my 8 year old's favorite flavor of ice cream).  The vanilla version I've made with my kids for the past few winters, I think I found it on the internet years ago.  The mint version was done with my boys creativity.  My boys gave a thumb up for the ice cream, but do eat it fast, as you can see from the picture, it starts melting really quick.
So, to our New York friends, make the best on the snow... make some snow angels and of course some snow ice cream.

Vanilla Snow Ice Cream
  • 4 - 5 cups of fresh, clean snow - don't pack it in, keep it loose.
  • 1 cup of milk
  • 1/2 teaspoon vanilla
  • 1/2 cups sugar

Mix together the milk, vanilla, and sugar. Stir until the sugar is dissolved. Slowly add the snow to your mixture, stirring constantly, until it is as thick as ice cream.  You might need more snow then written above, just add one cup at a time till mixture thickens.

Mint Snow Ice Cream
  • 4 - 5 cups of fresh, clean snow - don't pack it in, keep it loose.
  • 1 cup of milk
  • 1/2 teaspoon vanilla
  • 1/4 teaspoon mint
  • 1/2 cups sugar
  • drop of green coloring

Mix together the milk, flavor, sugar and coloring. Stir until the sugar is dissolved. Slowly add the snow to your mixture, stirring constantly, until it is as thick as ice cream. You might need more snow then written above, just add one cup at a time till mixture thickens.

Collecting snow on the back porch.
Adding the ingredients.


Prepared ice cream (the greener real life)
Yum! (started to melt quickly)

Enjoy the weather,

Chanie

Tuesday, January 25, 2011

Kids In The Kitchen #1 - Kids Can Help Too!

The kitchen is the family hub in my house.  Since I spend so much time there, my kids tend to find their way in there to hang out as well.  Often I find my self tripping over toys one of my boys left behind. (I know, why do I even bother reserving a specific room for toys?)  The kitchen also became the homework room, and also the 'Mommy! I'm bored!" room.  Since it's inevitable that they will end up there, might as well take the opportunity to get them helping out.   Here are a list of ideas that your kids can get you
kids involved.  Feel free to add more ideas in a comment below.
  • Set the table. Putting out placemats or tablecloth is easy even for a preschooler.  You can have you older kids set out the glass cups.
  • Preparing the vegetables.  My younger boys like to stand on a chair or step stool and scrub the vegetables.  My 8 year old can peel and even chop the vegetables.
  • Getting ingredients.  My boys often get the spices and other ingredients from the pantry as needed. They can help put it away after as well.
  • Mixing.  Kids love to stir the ingredients.  You can put the bowl on the table or have them pull a chair up to the counter.
  • Counting. Was that the second cup of flour, or the third?  Let your kids help you keep track.
  • Serving.  Let your kids dish out the food onto each plate and serve it at the table.
You can also take the opportunity to teach your kids about safety in the kitchen.  I will, G-D willing, be writing a post soon about how to teach your children about kitchen safety.

 Most of all, remember to enjoy your time with the kids,

Chanie

Monday, January 24, 2011

Thick And Tasty Butternut Squash Soup

Brrrr!!  It's cold out there.  Temperature today hit -30ºC, without factoring in the windshield. (-30 ºC = -22 ºF)  Want to see just how cold?  It's cold enough to freeze boiling water on contact.  Just check out this iReport video from CNN.  


Now this weather calls for some serious soup. I mean, not just a hot bowl of soup, but one that is thick and tasty to warm you through and through.  I came up with this butternut squash soup recipe a couple of years ago, and it fast became a family favorite for these cold winter nights.  In fact, we enjoy it so much, that I cannot help making it even in other seasons (thank G-D for air conditioning in the summer, so we can actually enjoy our meal)  This soup is super easy, and super tasty.

Thick And Tasty Butternut Squash Soup

2 medium onions - diced
1 medium butternut squash - diced
3 cloves garlic - coarsely chopped
4 1/2 teaspoons chicken soup mix
1 teaspoon salt
1/4 - 1/2 teaspoon crushed black pepper
1 Tablespoon canola oil

Heat canola oil in pot over medium heat.  Saute onions till just starts to brown.  Add butternut squash and garlic and continue to saute for 3 minutes.  Add spices and 5-6 cups water to pot and bring to boil.  Lower to simmer.  Simmer for 30 minutes, until butternut squash is soft.  Blend with an immersion blender in pot or in batches in a regular blender.  Garnish with fresh coarsely crushed pepper.


Hope you're enjoying the cozy indoors,

Chanie

Yummy Chunky Cookies

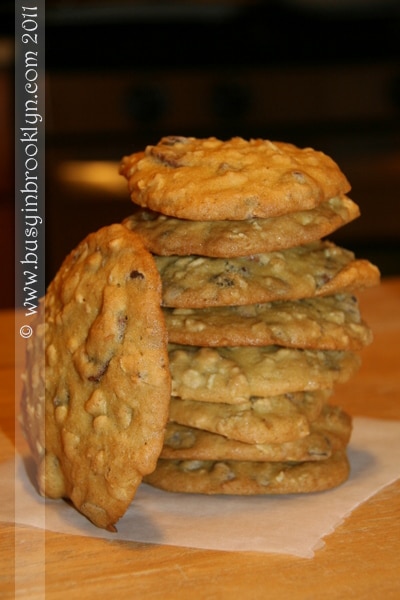
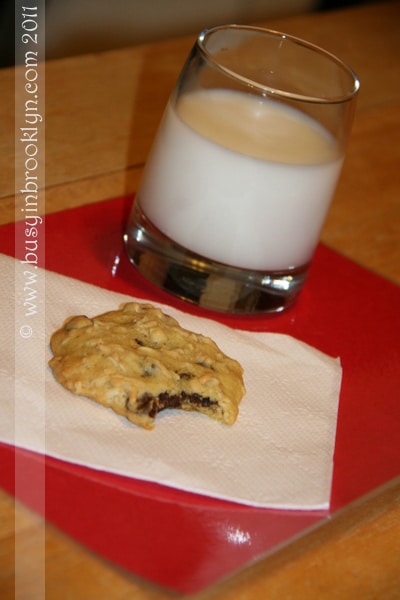
A friend of mine, Chanie, writes a fun blog which includes recipes and crafts, busyinbrooklyn.com.  Today she posted a scrumptious looking recipe for Cowboy Cookies, one I'm definitely going to try.  I think you might want to take a look at as well.
Cowboy Cookies Recipe


Enjoy,

Chanie

Sunday, January 23, 2011

Old Fashion Cinnamon Buns Plus A Chocolate Buns Variation

After close to a month without an oven, it feels liberating to finally be able to bake again (take that- woman's lib! Yes, I feel liberated to be able to work in my kitchen) without running over to my neighbor. (Don't worry, C.R.,  I'll find other reasons to barge in on you guys)

When ever I'm walking through the food court at the mall, there is one place I always crave to stop and grab a snack (well actually there are 2, I also crave those  ice cream flavors at Gelato La Paysanne, but I'll try making my own homemade gelato another time)  Anyways, back to my mall cravings, my mouth always waters when I walk by Cinnabon.  I really believe these cinnamon buns would give them a run for there money (or so I like to convince myself, since I cannot taste those) These buns, both the cinnamon and chocolate variation, are delicious warm from the oven. 

Note: for best results, always bring all ingredients to room temperature before you begin baking.


Homemade cinnamon buns and chocolate buns.
 Delicious Cinnamon or Chocolate Buns

Yeast Dough
1/2 cup sugar
4 1/2 teaspoons dry yeast
6 1/2 cups all purpose flour
1 1/2 teaspoons salt
1 cup transfat free margarine (warm)
1 1/4 cup apple juice
3 eggs
1/2 teaspoon vanilla

In bowl of stand mixer combine sugar, yeast, 2 cups flour and salt. Place margarine and apple juice in a pot, and cook till warm (dont have to melt margerinne).  Add to flour, yeast mixture.  Beat at low speed for 2 minutes.  Add eggs, vanilla and 2 cups of flour.  Beat 2 more minutes.  Add remaining flour and switch beater to kneading hook.  Knead apx 8 minutes till smooth.
Place dough in well oiled bowl and cover with greased wax paper and towel.  Allow to rise in warm place for 1 hour till doubles.
Divide dough in 2 equal pieces.
Preheat oven to 400*F.  Grease 2 cookie sheets and set aside.
Mix filling ingredients in bowl (ingredients listed below).   Roll out dough to large rectangle 18 x 12.  Spread with filling.  Roll up jelly roll style, holding longer side.  Do the same with second piece of dough and other filling.  Slice each 'jelly roll' into 1 inch slices.  Place on greased cookie sheets. Cover with towel and allow to rise 30 min till doubles. Brushing the buns with egg, at this point, can help the buns keep their shape while cooking, but this step isn't necessary. Bake for 20 minutes till golden.
For glaze, in small bowl, mix icing sugar, a few drops of vanilla and just enough water to make a thick but spreadable consistency.  Spread over warm buns.

Cinnamon Filling
1/4 cup margarine - softened
3/4 cup brown sugar
1 tablespoon cinnamon
1 Tbs. water (more or less, to thin to spread able consistency)

Chocolate Filling
1/4 cup margerine - softened
1 egg white
1 1/2 cup sugar
1/2 cup cocoa
1/2 Tbs. water

Glaze
1 cup icing sugar
a few drops vanilla extract
2-4 teaspoons water

Hope you enjoy,

Chanie

Thursday, January 20, 2011

Keep Those Cookbooks Clean

Ever notice how the cookbooks you love the most, are in the worst condition?  And as hard as you try, the cookbook shelf in the kitchen will never look neat due to so many out of shape cookbooks. 
Well, thanks to Shoshiet from www.imamother.com, I have decided to purchase the wood and acrylic cookbook stand from Amazon: Kitchen Cookbook Stand. I think this might be the solution to my chocolate covered, (if I'm lucky and they are not already stuck) pages of my favorite cookbooks.


Kitchen Cookbook Stand

Till next time,

Chanie